![]() |
|
![]() |
#1 |
Member
Join Date: Dec 2004
Location: Kernersville, NC, USA
Posts: 793
|
![]()
7. Take the right wrap, and pull it over the left, making an eye.
![]() 8. Pass the long end down through the eye, and out the right. ![]() 
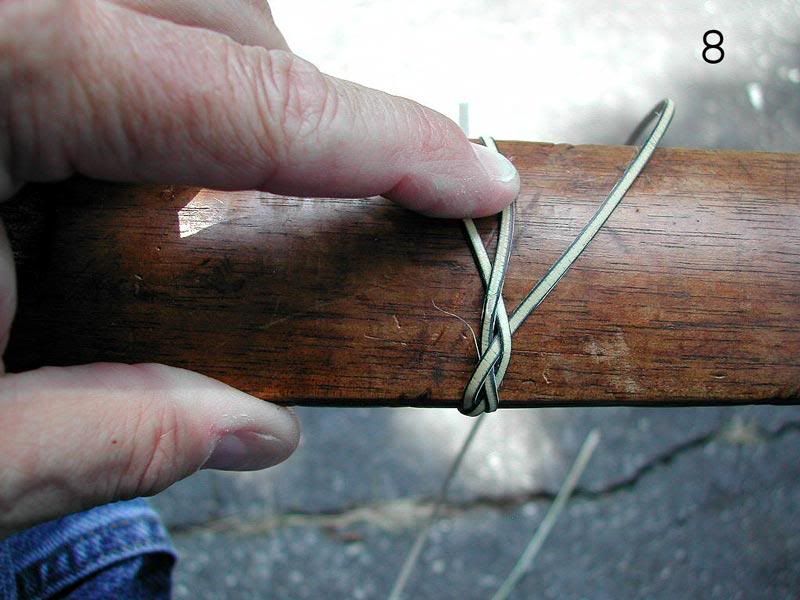
9. Pass the long end over the right wrap, and under the left. ![]() 10. Take the right wrap, and pull it over the left, making an eye. ![]() 11. Pass the long end down through the eye, and out the right. Then roll the scabbard toward you. ![]() 
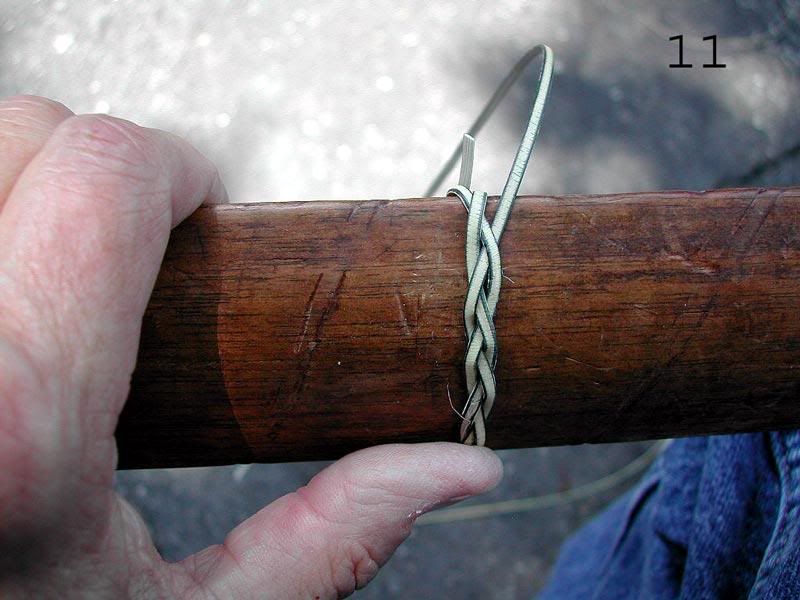
12. You MAY quit at this point, or you can parallel one or both of the lines all the way round, to make it stronger. I’m going to go round once more. ![]() Last edited by Ferguson; 1st July 2007 at 09:30 PM. |
![]() |
![]() |
![]() |
#2 |
Member
Join Date: Dec 2004
Posts: 951
|
![]()
Wouw very nice
Ben |
![]() |
![]() |
![]() |
#3 |
Member
Join Date: Dec 2004
Location: Kernersville, NC, USA
Posts: 793
|
![]()
13-18. Pick the best line, and parallel it all the way around.
![]() ![]() ![]() ![]() ![]() ![]() 19. When you get to the back of the scabbard again, tuck the long end underneath in an area that looks good to you, and cut it off. ![]() 20. Slide the ring up into position. If you like, you can put some white glue on the starting and ending points, and wipe off the excess. ![]() |
![]() |
![]() |
![]() |
#4 |
Member
Join Date: Nov 2006
Location: The Netherlands
Posts: 2,235
|
![]()
Thanks a lot !
This will be handy for an occasional restoration. Best regards, Willem |
![]() |
![]() |
![]() |
#5 |
Member
Join Date: Dec 2004
Location: Greenville, NC
Posts: 1,854
|
![]()
Thanks so much.
This really has the potential to bring alot of old scabbards back to life!! |
![]() |
![]() |
![]() |
#6 | |
Member
Join Date: Dec 2004
Location: Kernersville, NC, USA
Posts: 793
|
![]() Quote:
Steve |
|
![]() |
![]() |
![]() |
#7 |
Member
Join Date: Dec 2004
Posts: 987
|
![]()
That is a great presentation. Thanks.
![]() |
![]() |
![]() |
![]() |
|
|